
Hello Everyone,
I’m very pleased to introduce some major changes to the Firewall module and how security settings are arranged in FreePBX.
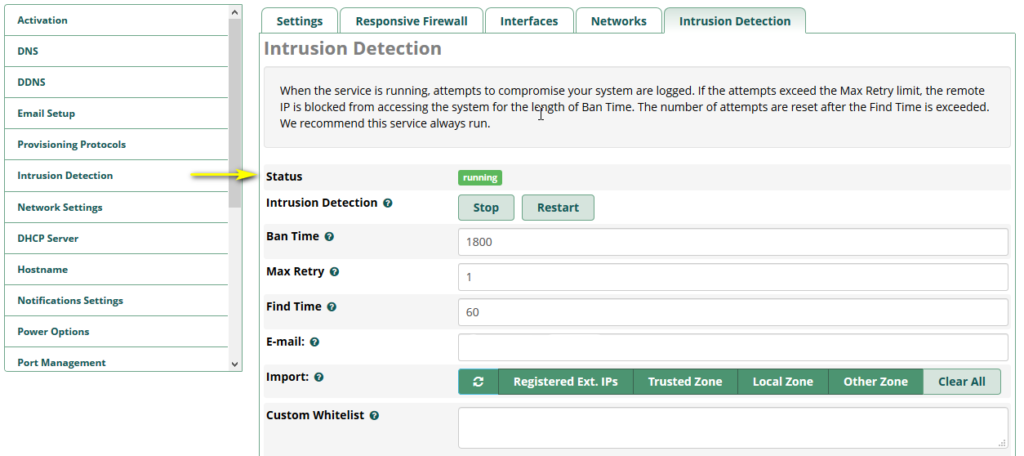
First, the Intrusion Detection settings have been moved from the System Admin module (sysadmin) to the Firewall module, a more appropriate security settings location.
Immediately after updating the Firewall module, the legacy Intrusion Detection settings will be shown how they have always been in their new location in Firewall, without buttons to select zones or get registered extensions.
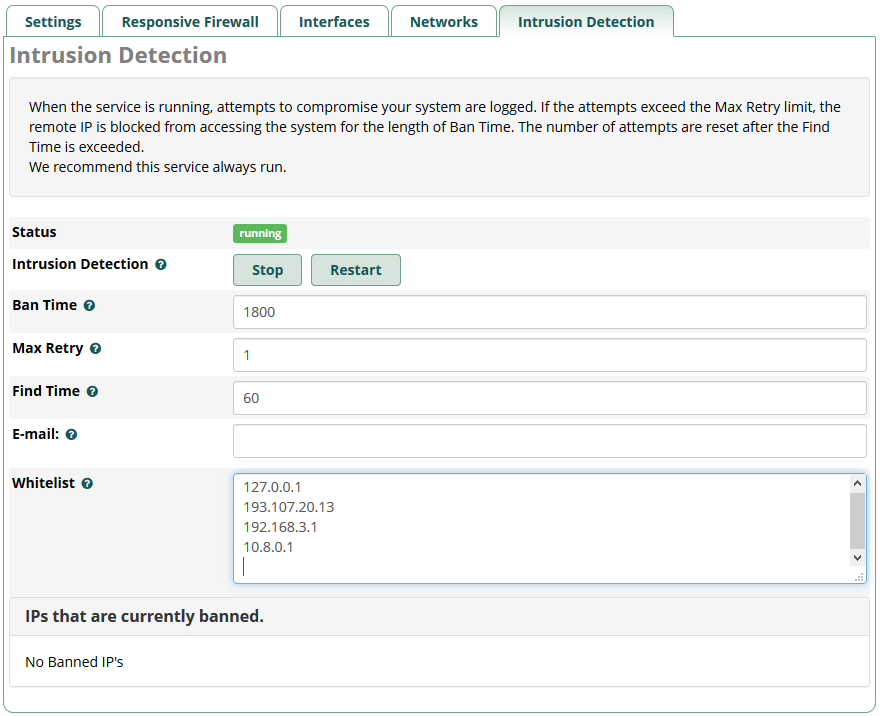
The fail2ban service will be started on boot, as it previously was. This behavior remains unchanged.
WARNING
For the first install, remember to clear the cache in your browser.
A message will appear on top of the page for reminding.

New Features
Enabling Intrusion Detection Sync
If you wish to activate extended features, go to Advanced Settings in the firewall to set Intrusion Detection Sync Firewall to Enabled or Disabled:
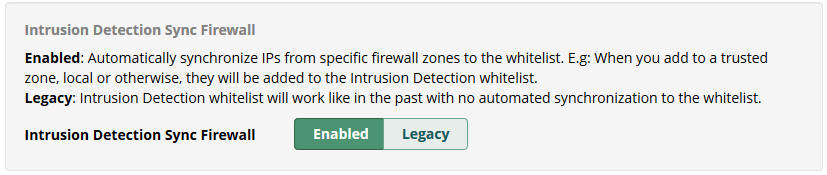
All entries currently populated in the Intrusion Detection whitelist will be moved to the custom whitelist when you switch from Legacy to Enabled. Likewise, all entries you have in the custom whitelist will be moved to the Intrusion Detection whitelist when you switch from Enabled or Disabled to Legacy.
Entries will not be moved when you switch from Enabled to Disabled or Disabled to Enabled.
When you switch to Enabled or Disabled, check the list and verify that all IPs or Hosts are in the correct zone. If you see duplicated entries in another zone, you can remove them from the custom whitelist and leave the system to set zones.
When setting Sync to Enabled, the following options will be shown:
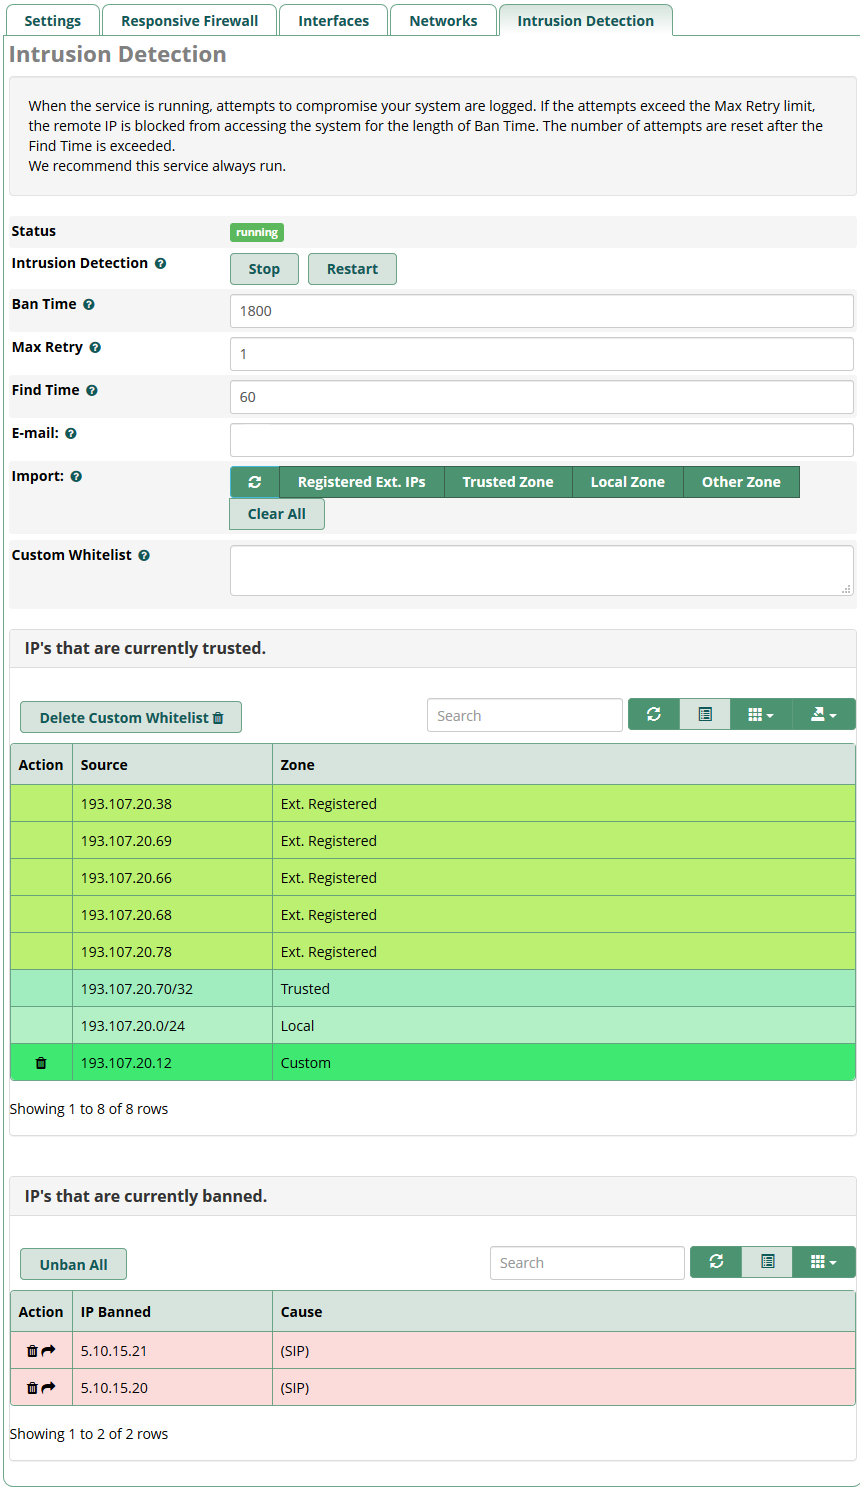
Import
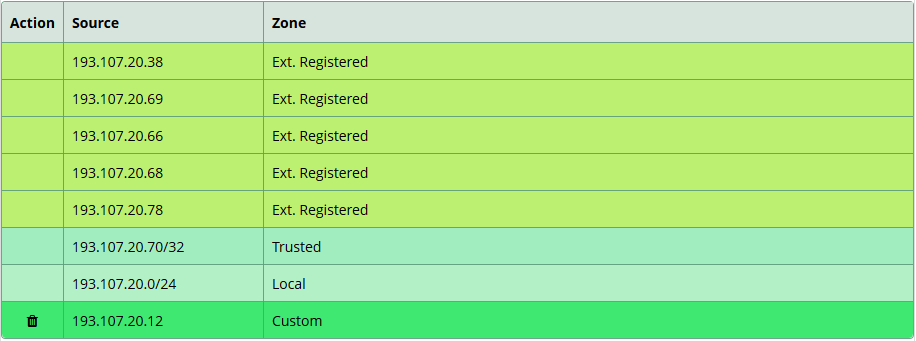
With the new version, Import buttons are available to provide an easy way to build an Intrusion Detection whitelist from existing Firewall zones and IPs from all registered extensions (SIP, PJSIP, IAX).

The Refresh and Clear All buttons can be used to alter the Whitelist entries. Changes to the Whitelist will not be saved unless the page’s Save button is clicked.
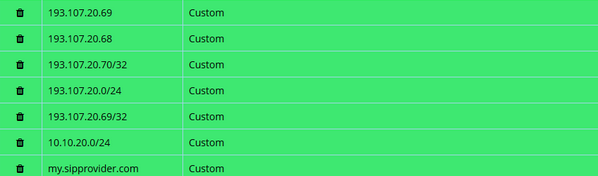
Additionally, you can add a custom whitelist entry.
This one will appear with the whitelist in the table below.

You can click the trash icon on the entry’s row to delete one IP address or one entry. After that, the table will be refreshed without this IP address.
If you decide to delete all entries at once, you can click on the Delete button on top of the table here.

Today it’s no longer necessary to restart Intrusion Detection to apply changes. When we save this part, it’s restarted automatically.
Note: When you save Intrusion Detection, the blacklist will be flushed only if there are changes in the settings, like Ban Time, Max Retry, Find Time, and E-Mail!
Banned IPs List

You can remove any IP address individually by clicking on the trash icon on the left of the row or the entire list at once by clicking on the Delete All button. You can also move the banned IP address to the custom whitelist by clicking on the arrow on the left of the row.
The IP will be removed from the banned list and added to the custom whitelist like this.
To apply changes immediately, click on the Save button. Otherwise, you can wait for the next syncing (every 5min: at h 00min, h 05min, h 10min ..etc.)
Like the whitelist, we use different colors to make types distinct in the table.
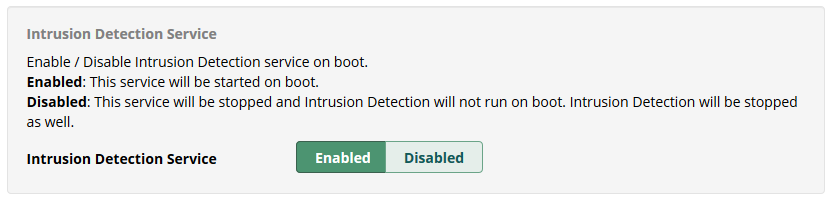
Stop Intrusion Detection Service on Boot
Would you like to permanently disable Intrusion Detection (fail2ban) on boot? The option to disable the service can be found in the Firewall’s Advanced Settings section:

Intrusion Detection will be stopped immediately, and its service on boot will be disabled as well.
Warning
It’s not recommended to disable this service permanently!
Be very careful when you use it.
A security alert will appear in the Dashboard, like this:
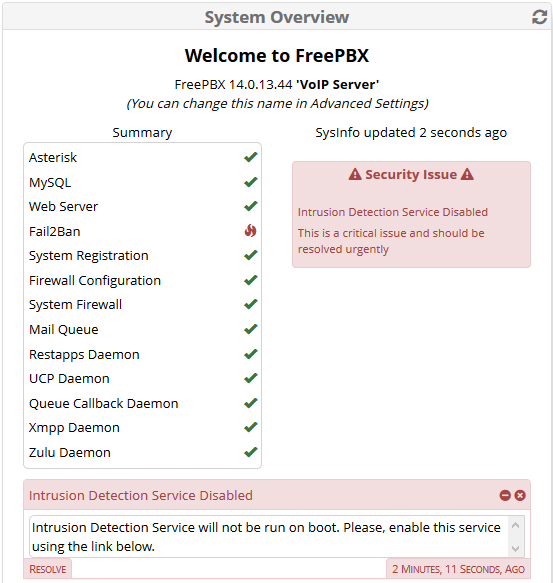
We can click on Resolve to enable this service and start Intrusion detection at the same time.
Automatic Synchronization
In Firewall Advanced Settings, we’ve got some new options about synchronization.
These actions can be done:
- Enabled:
Automatically synchronize IPs from specific firewall zones to the whitelist. e.g., When you add networks to a trusted zone, local or otherwise, they will be added to the Intrusion Detection whitelist. (*) - Legacy:
Intrusion Detection whitelist will work like in the past with no automated synchronization to the whitelist.
Note: (*) The cron job will be enabled and will run every 5 minutes.
If there is no difference between two synchronizations, this one will not be performed.
Console
We added a new console option to the Firewall module to be available from your system’s command line.
# fwconsole firewall sync
This command is used by the cron job as well. You can use it manually to force a synchronization any time you like. e.g.:
![]()
Other…
From the System Admin module
Intrusion Detection still exists in the menu, but we’ve got an automatic redirection toward the firewall module – Intrusion Detection tab.
Content filtering
Validation has been included in the field Custom Whitelist and Whitelist to prevent any wrong entries from crashing Intrusion Detection.

If any IP addresses or hosts don’t present a correct format, it will not be allowed to save the content.
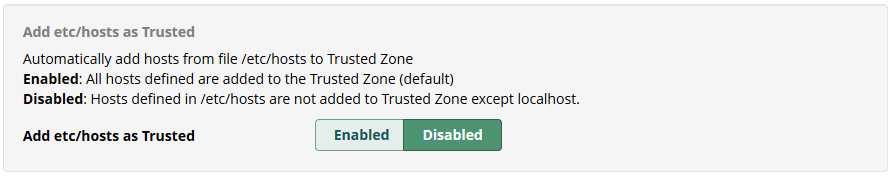
Add /etc/hosts as Trusted
Enable / Disable to automatically add any hosts from /etc/hosts to the trusted zone in iptables when used to fix any issue from DNS. IPs can be trusted or not.
Example
Imagine populating a custom whitelist without automatic syncing.
In this case, enable Intrusion Detection, Sync Firewall, and go to the Intrusion Detection tab in the main menu.
- Click on Registered Extensions IPs, and select some zones.
- In the table options, disable the columns Action and Type to get only IPs or Host.
- Click on the export button from the table, and select TXT. Next, open this file and select what you want to copy.
- Next, paste them into the custom whitelist, and unselect all import buttons.
- Save Intrusion Detection.
- The IPs will be saved without any automatic update.
There will be only your custom whitelist.
![]()
Feedback
Please provide feedback by either raising issues on the open-source bug tracking system or submit feature requests or improvements to enhance this module’s functionality.
Thank you for using FreePBX,
Franck Danard
Software Engineer – Sangoma Technologies